


Working on nodes
I remember that when I started with my rodmaking adventure, I use to hate this stage of the process. It was so tedious, so slow... only with time I have learned that "a slow work is a good work".
Now I really enjoy working on nodes because the results are just as I wanted to be always.
Mr. Martin J Keane talking about one of my rods told me in one of its letters:
"I take particular note by the way, of how much work was done to press down the nodes; I don't know that I have seen nodes this small in a rod in years, and any that I would have seen would have been quite rare. Old-timers at Leonard, Thomas, Payne, and Hawes etc. always took a lot of time pressing down the nodes but the effect was never quite as perfect, nor so small an area as you have achieved. I salute you for your great patience and dedication in this area which I consider to be one of the most important and critical elements in fine rod design."
After this praise, working on nodes become one of my favorite tasks. Any 2/2 rod because of my native cane have around of 72 to be transformed so... that's work.
Filling the nodes
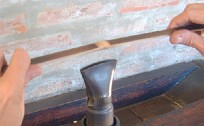
Simple tools, two limes in two different thickness and shapes and two C clamps.
Another important thing that you have to take care is the place to work. Personally I like to do it outside, where my mind is more suitable to make a relaxed work. I found into my house gallery a handrail that give me a firmly ground and a nice garden looking. Also "the boss" (wife) don't get angry because of the dirt involved into this work.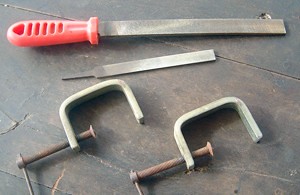
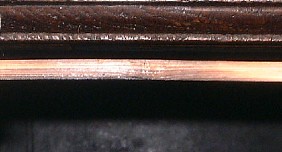
I support the strip with the C clamps and start working with the big file in the pit side of the node. I liked that this job finish with a plane surface. (see pictures)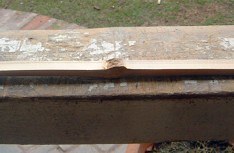
Them I attack the upside of the node. I work first with the big file and them I get the work finished with the little one, at the point that I get a polished surface. In the upside of the nodes I'll try to continue the round form of the strip and leave any node a little over-measure. This will disappear at the pressing stage.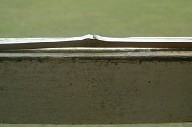
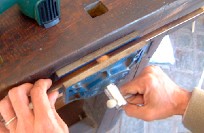
Pressing the nodes
Tools involved, a variable heat gun and a vice.
From those tools that I was able to choose I had tested many, and selected the Metabo Heat Gun and the Record Vice (mod. 50 / 51) no commercial interest just the ones I think are the best.
I bought the two models of vices, one is fixed on my workbench and the other one follows me wherever I go.
Steps in the pressing nodes stage.
a. heat the node sides.
b. press the node sides.
c. heat the node faces.
d. press the node faces.
When I heat the nodes I always take care that they don't get burned time and patience will tell us when it is too much.
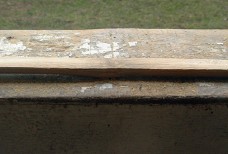
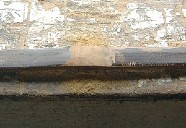
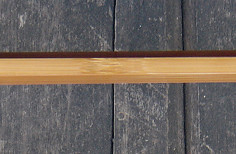
This is how the node look at their different stages: before & after.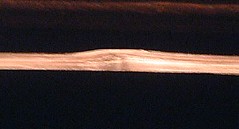
And these are how they look at four different finished rods.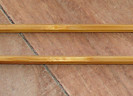


Thursday, August 9, 2007
Rodmaking I
Subscribe to:
Post Comments (Atom)
No comments:
Post a Comment